RISC-V GCC GUI
使用说明
安装
- 选择安装位置,默认安装于
C:\Program Files\RiscvCompiler
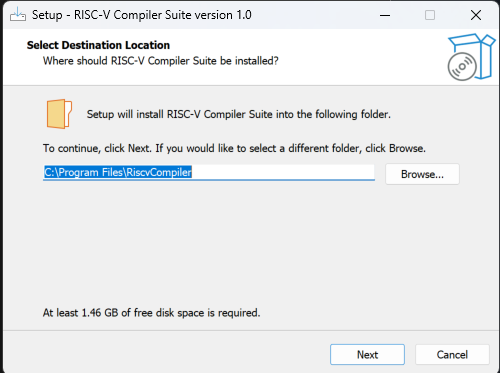
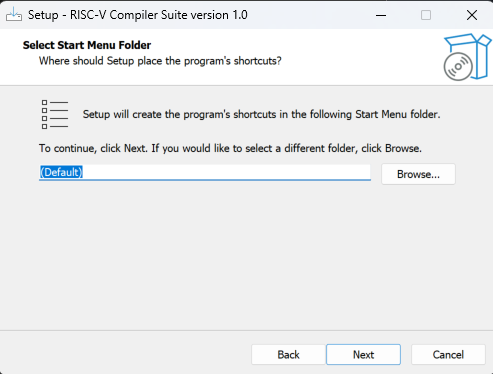
- 选择快捷方式存放位置,安装预计用时1分钟
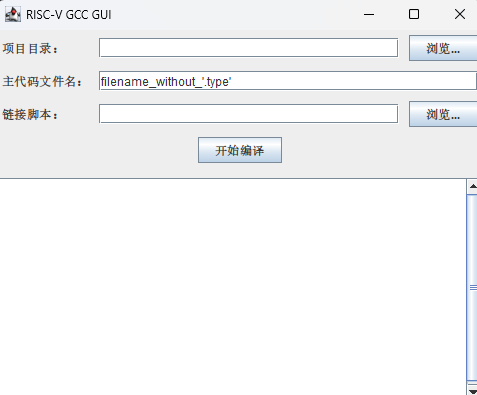
使用
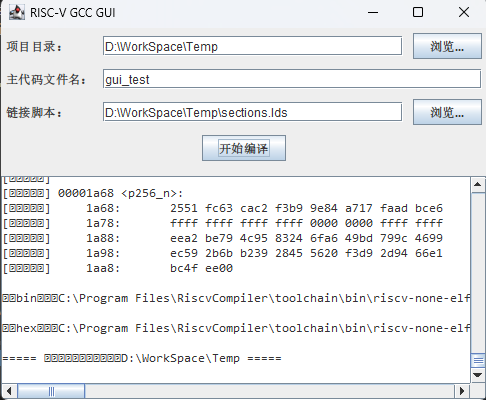
- 指定项目目录:C语言主程序、启动文件、链接脚本
- 指定主程序文件名(不带文件类型后缀),指定链接脚本
- GCC编译文件自动存入指定项目目录

PS脚本
- riscv-none-elf-gcc-xpack PowerShell编译脚本,是后续GUI开发的功能原型
工具链变量
1 | # TOOLCHAIN |
gcc:RISC-V架构的交叉编译器前端- 将C/C++源代码编译为RISC-V目标平台的机器码
- 管理整个编译流程(预处理→编译→汇编→链接)
- 支持RISC-V RV32/RV64指令集及扩展(如M/C/F/D等)
objcopy:目标文件格式转换工具- 提取/转换ELF文件中的特定段(如从.elf提取.bin固件)
- 生成可烧录的二进制镜像(如用于Flash编程)
- 修改文件头信息或段属性
objdump:目标文件分析诊断工具- 反汇编机器码为RISC-V汇编指令
- 显示ELF文件结构(段头、符号表等)
- 生成带地址的汇编列表文件
文件变量
1 | # PROJECT |
编译选项
1 | # OPTIONS |
- 性能强化:编译、链接双阶段优化
-O3+-flto
- 裸机环境适配:确保编译结果不依赖操作系统
-nostdlib+-ffreestanding+nosys.specs
- 代码尺寸优化:移除未使用代码、数据
-ffunction-sections+-fdata-sections
- 精简库:减小二进制体积
nano.specs
链接选项
1 | $LDFLAGS = @( |
- 部署控制:强制静态链接(
-Bstatic)和自定义内存布局(-T脚本)确保程序在目标硬件精确运行
编译命令
1 | # COMPILE |
GUI开发
工具准备
- Eclipse操作指南
- Eclipse的安装及入门指南
- JDK工具集的安装
- Inno Setup打包工具
- xpack-riscv-gcc下载
原型
- Eclipse新建Java Project,不勾选
Create module-info.java - 先实现调用本地GCC的GUI原型,再封装GCC及GUI
- Java GUI代码开源于我的GitHub仓库
- SSH地址:
git@github.com:arvinhwo/RISC-V-GCC-GUI.git
- SSH地址:
- 试运行
封装
- 将RISCV GCC和Java环境封装进安装包,达到开箱即用的目的
GCC打包
- 将编译工具链放入项目根目录并改名
toolchain- 目录结构为
riscv_compiler/toolchain/bin/riscv-none-elf-gcc.exe
- 目录结构为
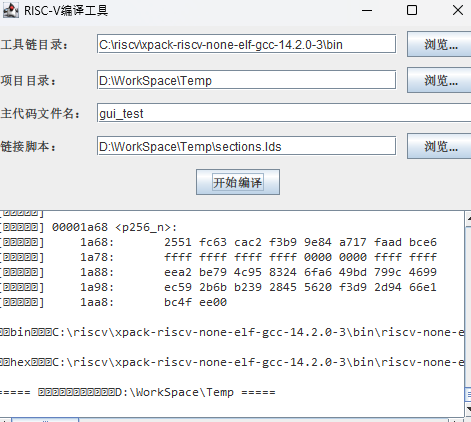
- 将原型中工具链路径由用户输入改为自动获取
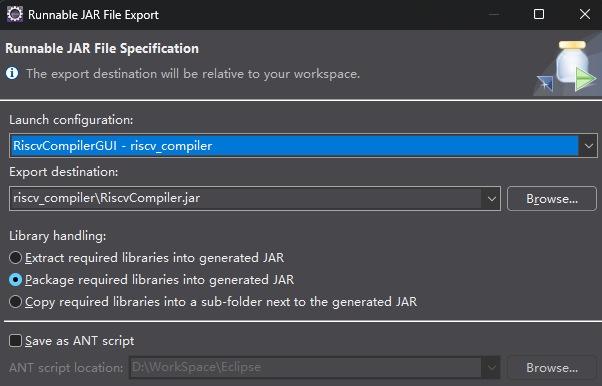
JAR打包
- 打包为
Runnable JAR file类型- 选择主类入口
RiscvCompilerGUI - risv_compiler - 打包依赖项
Package required libraries into generated JAR - 目录结构为
riscv_compiler/RiscvCompiler.jar
- 选择主类入口
- 使用JDK自带的
jlink在项目目录中生成精简JRE,使封装后的GUI能在无JDK的环境中运行- JDK添加到环境变量后,
jlink --module-path jmods --add-modules java.base,java.desktop --output jre - 目录结构为
riscv_compiler/jre/bin/java.exe - CMD验证JRE
jre\bin\java.exe -jar RiscvCompiler.jar
- JDK添加到环境变量后,
EXE打包
- 在项目目录中新建
setup.iss文件,使用Inno Setup打开并编译
1 | [Setup] |